5069-OB16: Wiring, Studio 5000 Configuration, and Output Control
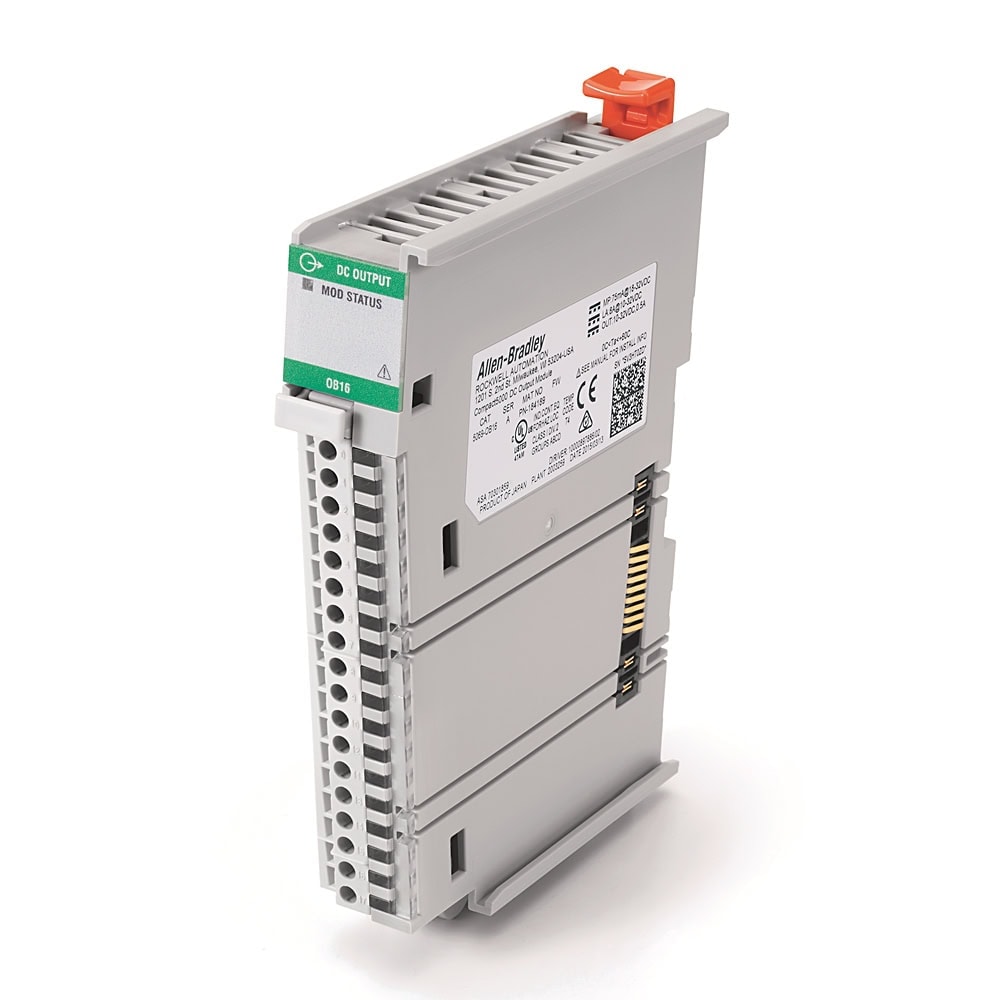 5069-OB16 16-channel 24VDC digital output module">
1. Module Overview
The 5069-OB16 is part of the Compact 5000 I/O platform, which replaced the older 1769 Compact I/O system. It plugs directly into the high-speed local I/O bus on the right side of a 5069-L3xx CompactLogix controller (or other 5069 I/O modules) and requires no separate backplane or rack assembly.
Catalog Number Breakdown
| Code | Meaning | Value |
|---|---|---|
| 5069 | Platform | Compact 5000 -- high-speed local I/O bus |
| O | I/O direction | Output module |
| B | Signal type | DC digital (Boolean) |
| 16 | Channel count | 16 output points |
Key Specifications
| Parameter | Value |
|---|---|
| Output type | Solid-state source (high-side switch) |
| Rated voltage | 24VDC (10 -- 32VDC operating range) |
| Max current per point | 0.5A continuous |
| Max current per module | 8A total (all 16 channels combined) |
| Output protection | Electronic short circuit / overcurrent per point |
| Output OFF leakage | <0.5 mA per point |
| Output delay time (backplane to screw, Off to On and On to Off) | ≤100 us (≤0.1 ms) @ 25 C / 0.5A |
| LA Power | 0.5A per channel, 8A per module @ 10 -- 32VDC |
| MOD Power | 75 mA @ 18 -- 32VDC |
| Power dissipation (max) | 3.25 W (16 channels @ 0.5A) |
| On-state voltage drop (max) | <0.2VDC |
| Off-state voltage (max) | 5VDC with 1 mA min load |
| Terminal block | Removable 18-position RTB (5069-RTB18-SPRING or 5069-RTB18-SCREW, ordered separately) |
| Operating temperature | 0 to 60 C |
2. Hardware Installation
The 5069-OB16 mounts on a standard 35mm DIN rail as part of the Compact 5000 system assembly. Modules connect side-by-side via a direct bus connector -- there is no backplane.
System Assembly Order (Left to Right)
- 5069 Power Supply (5069-PA2, PA3, or PD1) -- always the leftmost module
- CompactLogix Controller (e.g. 5069-L306ER) -- snaps to the right of the power supply
- Local I/O Modules (5069-OB16 and others) -- snap to the right of the controller in any order. Slot 1 is the first module immediately right of the controller. Up to 16 local I/O modules are supported.
- End Cap / Terminator (5069-FPD) -- required on the rightmost module to close the bus
Mounting the 5069-OB16
- With power OFF, hook the top of the module onto the DIN rail
- Rotate the module downward until the bottom latch clicks onto the rail
- Slide the module left until the bus connector engages with the adjacent module -- you will feel a positive click
- Verify the module is fully seated: there should be no visible gap between adjacent modules
- Install the removable terminal block (RTB) by pressing it straight into the front of the module until it locks
3. Wiring
The 5069-OB16 uses an 18-position removable terminal block (5069-RTB18-SPRING or 5069-RTB18-SCREW, ordered separately). The 16 output channels occupy pins 0 through 15. The module receives field-side power via the Local Actuator (LA) terminals -- LA+ and LA- -- on pins 16 and 17. You must supply external 24VDC field power to the LA+ and LA- terminals. The module does not draw current from the SA power bus that is internal to the system.
Terminal Assignments
| Terminal | Label | Function | Notes |
|---|---|---|---|
| 0 | Out 0 | Output channel 0 | Sources +24VDC when ON |
| 1 | Out 1 | Output channel 1 | Sources +24VDC when ON |
| 2 | Out 2 | Output channel 2 | Sources +24VDC when ON |
| 3 | Out 3 | Output channel 3 | Sources +24VDC when ON |
| 4 | Out 4 | Output channel 4 | Sources +24VDC when ON |
| 5 | Out 5 | Output channel 5 | Sources +24VDC when ON |
| 6 | Out 6 | Output channel 6 | Sources +24VDC when ON |
| 7 | Out 7 | Output channel 7 | Sources +24VDC when ON |
| 8 | Out 8 | Output channel 8 | Sources +24VDC when ON |
| 9 | Out 9 | Output channel 9 | Sources +24VDC when ON |
| 10 | Out 10 | Output channel 10 | Sources +24VDC when ON |
| 11 | Out 11 | Output channel 11 | Sources +24VDC when ON |
| 12 | Out 12 | Output channel 12 | Sources +24VDC when ON |
| 13 | Out 13 | Output channel 13 | Sources +24VDC when ON |
| 14 | Out 14 | Output channel 14 | Sources +24VDC when ON |
| 15 | Out 15 | Output channel 15 | Sources +24VDC when ON |
| 16 | LA+ | Local Actuator power +24VDC | Connect to +24VDC from external field power supply |
| 17 | LA- | Local Actuator power return (0VDC) | Connect to 0VDC of external field power supply |
How Source Outputs Work
When the PLC program energizes an output (e.g. channel 0), the module internally connects the LA+ supply rail to the Out 0 terminal through a solid-state switch. Current flows from the output terminal, through the field device, and returns to the LA- (0VDC) rail via the device's ground/common connection. The load connects between the output point and the LA- (return) side of the power supply.
Connecting Common Field Devices
| Field Device | Wiring | Notes |
|---|---|---|
| 24VDC indicator light | Output terminal to LED (+), LED (-) to LA- | Verify LED rated current is under 0.5A. Most panel LEDs draw 10-30mA -- well within limits. |
| 24VDC relay coil | Output terminal to coil (+), coil (-) to LA- | Install a suppression diode across the coil (cathode to +). See inductive load protection below. |
| 24VDC solenoid valve | Output terminal to solenoid (+), solenoid (-) to LA- | Check solenoid inrush current. If it exceeds 0.5A, use an interposing relay. |
| Motor starter contactor (24VDC coil) | Output terminal to coil A1, coil A2 to LA- | Most IEC contactors draw 40-80mA at 24VDC -- no interposing relay needed. Add suppression diode. |
| 120/240VAC loads | Not directly supported | Use a 24VDC interposing relay or the 5069-OW16 relay output module instead. |
Inductive Load Protection
When driving inductive loads (relay coils, solenoid valves, contactors), the collapsing magnetic field generates a voltage spike when the output turns OFF. While the 5069-OB16 includes internal clamp circuitry, it is best practice to install external suppression at the load to extend output life and reduce electrical noise:
- Suppression diode (flyback diode) -- Connect a 1N4007 (or equivalent) diode across the coil with the cathode on the positive side (the output terminal side) and the anode on the return side. This is the most common method for DC coils.
- RC snubber -- For applications where turn-off speed is critical (fast solenoid response), use a 47-ohm / 0.1uF RC network across the coil instead of a diode. The diode method slows the coil release by a few milliseconds; the RC method does not.
Common / Return Wiring Best Practice
4. Studio 5000 Configuration
Adding the Module to the I/O Tree
- In the Controller Organizer, expand I/O Configuration and right-click your controller node
- Select New Module and search for
5069-OB16 - Select the module from the catalog and click Create
- Set the Slot number to match the physical position. Slot 1 = first module right of the controller, Slot 2 = second module, etc.
- Set the module Name (e.g.
DO_Slot3) -- this becomes the prefix for all output tags - Click OK -- the module appears in the I/O tree and output tags are created automatically
Output Data Tags
Once the 5069-OB16 is added to the I/O tree, Studio 5000 creates the following tag structure (assuming slot 3 and module name DO_Slot3):
| Tag | Type | Description |
|---|---|---|
Local:3:O.Pt00.Data | BOOL | Output channel 0 (1 = ON, 0 = OFF) |
Local:3:O.Pt01.Data | BOOL | Output channel 1 |
Local:3:O.Pt02.Data through .15 | BOOL | Output channels 2 through 15 |
Local:3:I.Fault | DINT | Module fault status word (read-only) |
Local:3:I.ConnectionFaulted | BOOL | Controller lost connection to the module — affects all channels |
Local:3:I.Ptxx.Fault | BOOL | Per-point fault — point data quality is bad (xx = 00–15) |
Local:3:I.Ptxx.NoLoad | BOOL | No load detected on the point (must be enabled in module config) |
Local:3:I.Ptxx.ShortCircuit | BOOL | Short circuit detected on the point |
Local:3:I.Ptxx.FieldPowerOff | BOOL | Field power lost on the point |
Local:3:I.Ptxx.Data | BOOL | Data echo — reflects the commanded output state (xx = 00–15) |
Local:3:I.Ptxx.Uncertain | BOOL | Point data can be imperfect |
Local:3:I.DiagnosticActive | BOOL | TRUE if any diagnostics are active or prognostic threshold reached |
Local:3:I.RunMode | BOOL | TRUE when module is in Run Mode |
SOL_Valve_1, Motor_1_Run, Pilot_Green. This makes the ladder logic self-documenting and significantly easier to troubleshoot on-site.
Configuring Fault Response (Hold Last State vs. Clear to Zero)
- In the I/O tree, right-click the 5069-OB16 module and select Properties
- Go to the Connection tab
- Under Output States in Fault Mode, choose per point:
- Off (default) -- the output turns OFF if a fault condition occurs. This is the safest option for most applications.
- Hold Last State -- the output remains in its current state during a fault.
- On -- the output is forced ON during a fault.
- Under Duration of Fault Mode, choose per point:
- Forever (default) -- the output remains in the fault state until the fault is cleared.
- 1, 2, 5, or 10 seconds -- the output holds the fault state for the specified duration, then turns OFF.
- Under Output States in Program Mode, choose per point:
- Off (default) -- outputs turn OFF when the controller is in Program mode.
- Hold Last State -- outputs remain in their last commanded state.
- On -- outputs are forced ON.
- Click OK to save
Inhibiting Outputs
During commissioning, you can inhibit the entire module to prevent any outputs from energizing while you test other parts of the system:
- Right-click the 5069-OB16 in the I/O tree
- Select Properties and check Inhibit Module
- With the module inhibited, all outputs are forced OFF regardless of the program logic. The module status shows a yellow triangle in the I/O tree.
- When ready to go live, uncheck Inhibit Module and apply
5. Controlling Outputs in Ladder Logic
Core Output Instructions
| Instruction | Mnemonic | Behavior | Use Case |
|---|---|---|---|
| Output Energize | OTE | ON when rung is true, OFF when rung is false. Evaluated every scan. | Standard output control -- indicator lights, solenoids, motor run outputs |
| Output Latch | OTL | Sets the output ON when rung goes true. Remains ON even when rung goes false. | Latching a fault indicator that must be explicitly reset |
| Output Unlatch | OTU | Resets a latched output OFF when rung is true. | Clearing a latched fault or alarm |
Accessing Output Tags
In ladder logic, reference the output data tags using the standard Compact 5000 addressing format:
Practical Example: Motor Contactor Control with Interlock Logic
The following ladder logic controls a motor contactor and indicator lights using the 5069-OB16 (Slot 3). Inputs are on a 5069-IB16 (Slot 2). This implements a standard start/stop seal-in circuit with overload interlock and a safety gate interlock.
6. Diagnostics & Troubleshooting
LED Indicators
| LED | State | Meaning |
|---|---|---|
| MOD (Module Status) | Solid green | Module operating normally, connected to controller |
| MOD | Flashing green | Module powered but no connection to controller (not configured or inhibited) |
| MOD | Solid red | Unrecoverable module fault -- replace module |
| MOD | Flashing red | Recoverable fault -- check module properties in Studio 5000 for fault code |
| OUT 0-7 / OUT 8-15 | Solid green (per point) | Output point is ON and sourcing current |
| OUT | Off | Output point is OFF |
| OUT | Flashing red | Point fault: overcurrent or short circuit detected on that channel |
Detectable Fault Conditions
The 5069-OB16 provides three categories of per-point diagnostics, reported through the Local:X:I.PtXX.Fault tags:
| Fault Type | Description | Module Behavior |
|---|---|---|
| Short Circuit Protection | Output current exceeds the module's rated capacity on a channel | The module disables the faulted channel and sets the corresponding I.PtXX.Fault tag |
| No Load Detection | An output is commanded ON but the module detects no current flow (broken wire, disconnected load) | The I.PtXX.Fault tag is set for the affected channel |
| Field Power Loss | The external 24VDC field power supply connected to LA+/LA- is missing or below threshold | All channels report a fault condition |
There are no physical or electronic fuses in the 5069-OB16. All protection is handled by solid-state circuitry.
Monitoring Point Faults in the PLC Program
Use the per-point fault tags to detect and alarm on channel-level issues:
To reset a point fault, remove the fault condition (repair the short, reconnect the load, restore field power), then toggle the output OFF and back ON, or reset the module from Studio 5000.
Checking Module Status in the Program
For runtime diagnostics, check the module status tags programmatically:
| Tag | Check | Action |
|---|---|---|
Local:3:I.Fault | Non-zero = module-level fault | Log fault code, alert maintenance, check wiring |
Local:3:I.Ptxx.Fault | True = fault on that output point | Check the specific diagnostic tags below |
Local:3:I.Ptxx.ShortCircuit | True = overcurrent/short on that channel | Disconnect load, check wiring, measure current |
Local:3:I.Ptxx.NoLoad | True = no current flow detected | Check field wiring, verify load is connected |
Local:3:I.Ptxx.FieldPowerOff | True = field power lost | Check 24VDC field power supply, verify LA+/LA- connections |
Local:3:I.ConnectionFaulted | True = controller connection lost | Check module seating, bus connector, power cycle |
Local:3:I.DiagnosticActive | True = at least one diagnostic active | Review Ptxx tags to identify specific fault |
Common Troubleshooting Scenarios
| Symptom | Likely Cause | Resolution |
|---|---|---|
| Output ON in program but field device does not energize | No field power supply connected to LA+/LA- terminals, external PSU failure, broken wire | Verify 24VDC present at LA+/LA- terminals with multimeter; check wiring continuity |
| Output point LED flashing red | Overcurrent or short circuit on that channel | Disconnect the load and reset the fault. Measure load current with a clamp meter before reconnecting. |
| All outputs dead, MOD LED flashing green | Module not configured in Studio 5000 or module inhibited | Verify module is in the I/O tree at the correct slot number; check Inhibit Module is unchecked |
| Outputs drop out intermittently | Loose terminal connection, marginal field power supply voltage | Re-torque terminal connections; verify 24VDC field supply stays within 10 -- 32VDC under load |
| MOD LED solid red | Unrecoverable hardware fault | Cycle power. If the red LED persists, the module has failed and must be replaced. |
| Module shows yellow triangle in I/O tree | Module inhibited, slot number mismatch, or module not physically present | Right-click the module in the I/O tree, check properties, verify physical slot matches configuration |
7. Related 5069 Digital Output Modules
Rockwell offers several digital output modules in the Compact 5000 platform. Selecting the right module depends on channel count, load type, safety requirements, and environmental conditions.
| Catalog Number | Channels | Output Type | Max Current/Point | Key Feature |
|---|---|---|---|---|
| 5069-OB16 | 16 | 24VDC source (solid-state) | 0.5A | Standard digital output -- this guide |
| 5069-OB8S | 8 | 24VDC source (safety) | 0.5A | SIL 3 / PLe safety-rated outputs for GuardLogix safety tasks |
| 5069-OB16K | 16 | 24VDC source (solid-state) | 0.5A | Conformal coated for harsh environments (humidity, dust, chemical exposure) |
| 5069-OB32 | 32 | 24VDC source (solid-state) | 0.5A | High-density 32-point module in a 1.5-slot-wide form factor |
| 5069-OB16F | 16 | 24VDC source (solid-state) | 0.5A | Fast output: sub-millisecond response for high-speed sorting, filling, or marking |
| 5069-OW16 | 16 | Relay (form A) | 2A | Relay outputs for AC loads (120/240VAC) or higher DC current; electrically isolated |
8. Related Guides
Continue building your Compact 5000 system with these guides:
5069 Digital Input Guide
Wiring pushbuttons, proximity sensors, and limit switches to the 5069-IB16 digital input module.
5069 Analog Output Guide
Configuring the 5069-OF8 for 4-20mA and 0-10V control signals to drives, valves, and transducers.
CompactLogix 5069-L306ER Setup
First-time controller setup, power wiring, Studio 5000 project creation, and EtherNet/IP network configuration.
Reference Documentation
The following Rockwell Automation publications were used as references for this guide. These are the official manufacturer documents for the hardware covered in this article.
| Publication | Description | Download |
|---|---|---|
| 5069-UM004 | Compact 5000 Digital I/O Modules User Manual | |
| 5069-IN007 | 5069-OB16 Installation Instructions | |
| 5069-TD001 | Compact 5000 I/O Technical Data |
Shop the Compact 5000 I/O Range
Digital output modules and the full Compact 5000 I/O catalog.
Need a 5069-OB16 or Other Compact 5000 I/O?
PLC Exchange stocks 5069-series digital output modules with a 2.5-year warranty and same-day shipping. Get pricing in a few hours.